Running a Workflow Manually Through PatchWork
This is the foundation of generation — you, in PatchWork's web UI, clicking through the workflow node by node. Slower than automation, but you see every step and understand what's actually happening. Learn this first; the automation in Chapter 13 will then make sense.
Quick refresher
PatchWork is the visual web app at patchwork-33m.pages.dev that holds workflow files (.nbflow) and shows you the generated candidates. G-Labs is a small local service (running on your laptop, port 8765) that PatchWork talks to when it needs to call NanoBanana 2 or Veo 3.1. The two are connected via a cloudflared tunnel — a temporary public URL that lets PatchWork (on the public web) reach G-Labs (on your laptop). All of this is covered in detail in G-Labs + cloudflared Setup if you haven't read it yet.
What "manually" means
A workflow file (.nbflow) describes a graph of nodes — prompt nodes, image gen nodes, video gen nodes, approval gates. Manually running it means:
flowchart TB
    A[Open .nbflow in PatchWork] --> B[Configure G-Labs URL]
    B --> C[Click first image gen node]
    C --> D[Click 'Generate']
    D --> E[Wait for 4 candidates]
    E --> F[Click approval gate]
    F --> G[Pick best candidate]
    G --> H[Click first Veo node]
    H --> I[Click 'Generate']
    I --> J[Wait for 4 clips]
    J --> K[Pick best clip]
    K --> L[Repeat for each scene]
You're walking the graph by hand. Each gen takes 10-60 seconds. A 10-scene workflow takes 30-90 minutes of human-paced clicking.
Why learn this first
You can skip straight to the Generation Runner and have everything done in one command — but you'll be using a tool you don't understand. When something fails, you won't know where in the graph things went wrong or how to fix individual nodes.
Manual runs teach you:
- What each node actually does
- What order things run in
- What an Approve gate is for (it lets you pick before downstream nodes consume the output)
- What inputs each gen needs (prompt + references)
- What the output looks like at each step
After 1-2 manual runs, the Generation Runner makes total sense. Before that, it's a black box.
Step 1: Open the workflow in PatchWork
- Open https://patchwork-33m.pages.dev/ in a browser
- Click Import Project
- Select the
.nbflowfile you want to run
When you click New Project instead of Import, PatchWork shows the template chooser:
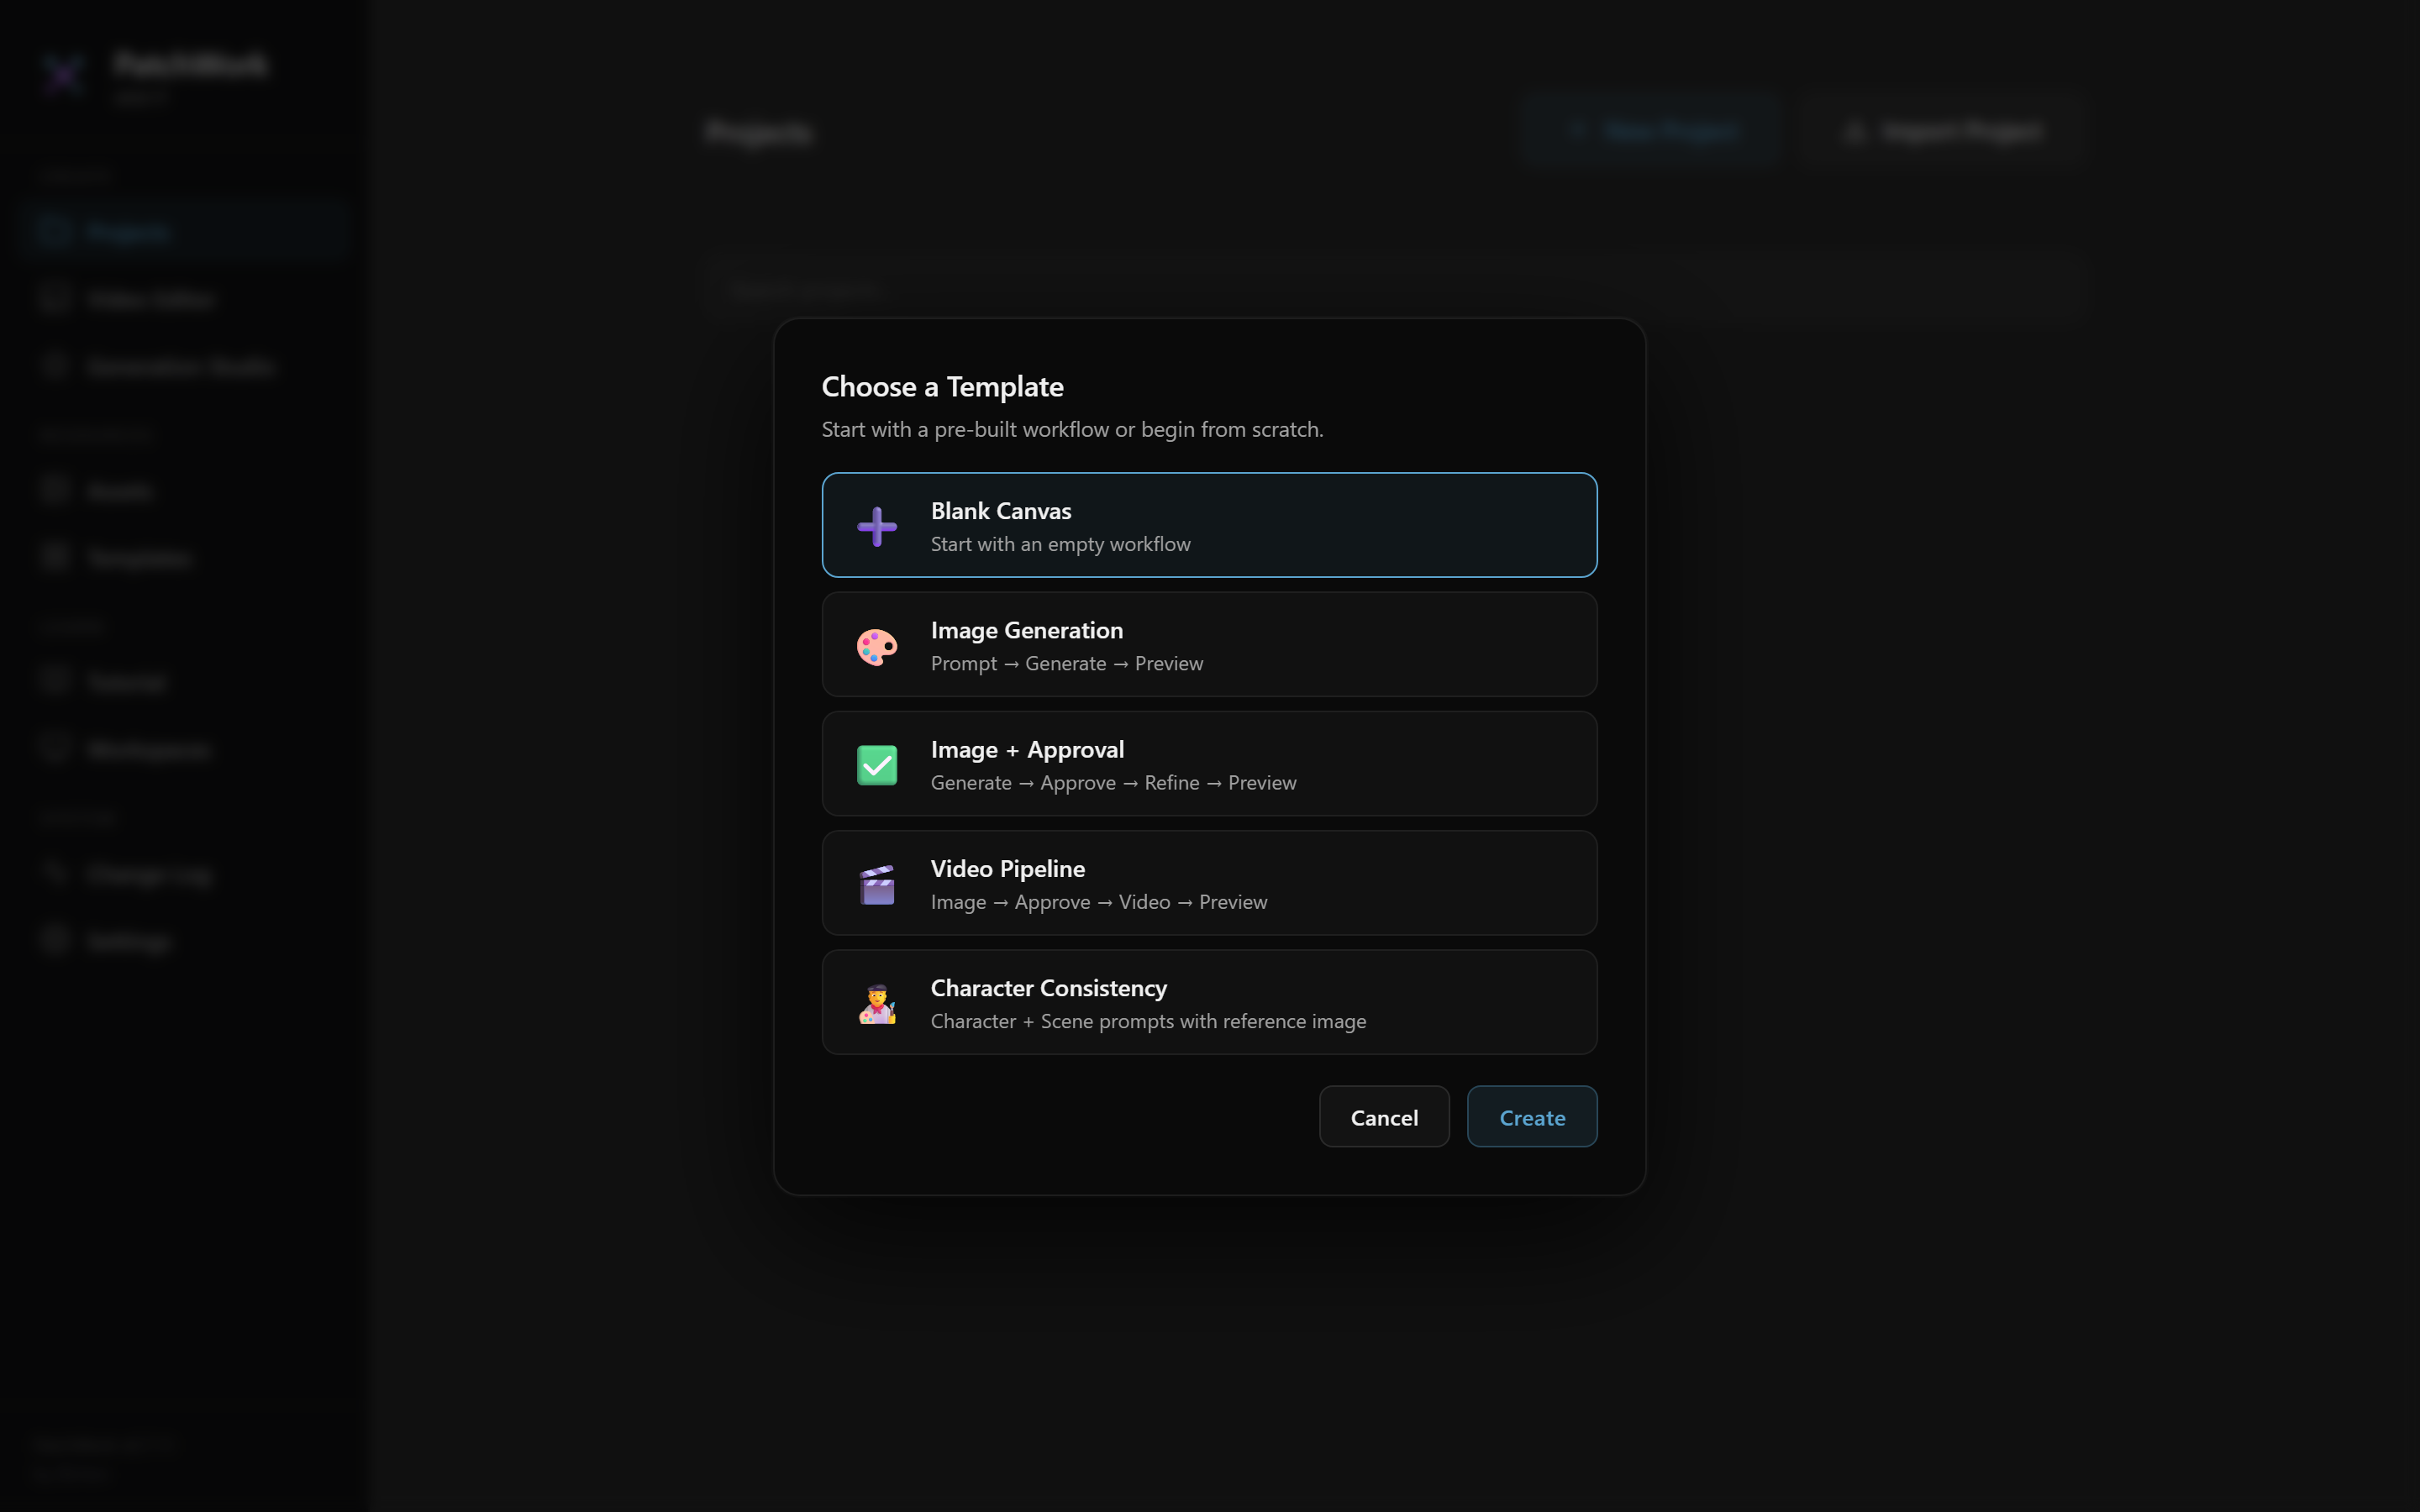
For running an existing workflow, always Import — don't pick a template. Templates are for building new workflows from scratch (which is what our pipeline does for you anyway). 4. The graph appears on the canvas — nodes connected by lines
If you have a multi-account workflow (multiple tabs), the tabs sit at the top of the canvas. Switch between them to work on each account's flow independently.
Step 2: Configure G-Labs URL
PatchWork needs to know where your local G-Labs backend is. The cloudflared tunnel URL changes every session (see G-Labs + cloudflared Setup).
- In PatchWork, open Settings (in the sidebar)
- Paste the current cloudflared tunnel URL into the G-Labs Server URL field
- Save
PatchWork stores this in your browser's local storage. You only have to update it when the tunnel changes (every session).
Step 3: Run the first image gen
Find the first NanobananaAPI node in the graph. (NanobananaAPI is the name of the node type that calls NanoBanana 2 — the image generation model. There's one of these per scene that needs an image.) Click it to select.
A panel opens showing:
- The prompt text feeding into it (from the connected Prompt node)
- The reference images wired in (avatar reference, product photo — these come from the
.nbflowitself; they're already wired when the pipeline built the workflow file) - The model and outputCount settings
- A Generate button
Click Generate. PatchWork sends the request to G-Labs (via the tunnel). 10-30 seconds later, 4 candidate images appear in the node's gallery.
Step 4: Approve a candidate
Find the Approve node downstream of the image gen. Click it.
The Approve gallery shows the 4 candidates from the image gen. Click the one you want to keep. PatchWork remembers your pick.
The picked image now flows downstream — typically to a Veo3 node that needs the approved still as its start frame.
Step 5: Run the Veo3 node
Find the Veo3 node downstream of the Approve gate. Click it.
The panel shows:
- The video prompt feeding in (from the Veo template / Dynamic Prompt)
- The start frame (from your approved image gen)
- The end frame (often the same image, or null)
- Model and outputCount settings
- A Generate button
Click Generate. Video gen takes longer than image gen — usually 30-90 seconds. After it finishes, 4 candidate clips appear in the node's gallery.
Step 6: Approve a clip
Click the Approve node downstream of the Veo3 node. Pick the best of the 4 clips.
That's one scene done. Move to the next.
Step 7: Repeat for every scene
For a 10-scene workflow:
- 10 image gen nodes to run
- 10 image Approve gates to click
- 10 Veo3 nodes to run
- 10 video Approve gates to click
That's 40 clicks across the workflow. At 30-60 seconds per generation, the full run is 30-60 minutes including thinking time.
You can:
- Run them in order (Scene 01 → 02 → 03 → ...) — easiest to track
- Run all image gens first, then all video gens (batch) — slightly faster if image gens fail and need re-rolls
- Run multiple gens in parallel if PatchWork lets you (some installs do, some don't)
What happens if a generation fails
A failure shows up as an error in the node's panel:
- "Connection refused" → G-Labs isn't running or tunnel is stale (see Setup checklist)
- "API key invalid" → wrong key in G-Labs configuration
- "Content policy violation" → prompt tripped a safety filter. Edit the prompt or re-roll the seed
- "Timeout" → the gen took too long. Bump the timeout in node properties or just retry
Click Generate again to retry the same node. The error doesn't propagate — only the failed node retries.
Multi-account workflows
If your .nbflow has multiple tabs (one per account), you run each tab independently. The same 40-click process per tab. A 5-account, 10-scene workflow = 200 clicks if done fully manually.
This is where the Generation Runner starts to pay off (Chapter 13). But for your first few workflows, do at least one tab manually so you've felt every step.
What you learn
After your first manual run, you'll understand:
- Why Approve gates exist — you control which candidate flows downstream
- Why the graph is wired the way it is — image gens feed Veo gens; references feed image gens
- What a node's properties panel shows — the prompt, the references, the settings
- What can go wrong at each step — a failed gen, a missing reference, a stale URL
This understanding is the foundation for everything else in the wiki. The Generation Runner is a labor-saver, not a substitute.
Tracking your picks
PatchWork autosaves your picks. If you close the tab and come back later, your previous picks are still selected.
But the .nbflow file on your laptop doesn't update automatically — PatchWork stores picks in the browser. To persist your picks to the file, export the workflow:
- File → Export (or Save) in PatchWork
- PatchWork serializes the current state (including your picks) to a new
.nbflow - Save it next to your source file
That exported .nbflow is what you'd hand to the next step (post-production, fan-out, etc.).
Common mistakes during manual runs
Forgetting to update the G-Labs URL- Tunnel URLs change every session. If you start a session with yesterday's URL set, every gen fails until you update it.
Running Veo before approving the image- Veo needs the approved still as its start frame. If you haven't clicked an approval in the image's Approve gate, Veo has nothing to use. PatchWork should flag this — but it's still easy to forget the order.
Running all 40 nodes without checking outputs- If image gen Scene 03 looks wrong, you don't want to waste Veo budget generating videos for it. Check the image's candidates before running the Veo node.
Not exporting after picks- You spent 90 minutes picking candidates. You close the tab. Your picks are still in browser local storage — but if you open the workflow elsewhere, the picks aren't there. Export to persist.
When manual makes sense vs. when to automate
| Situation | Manual | Generation Runner |
|---|---|---|
| First time using the pipeline (learning) | YES | No (yet) |
| Validating a single scene | YES | No |
| Iterating on a prompt by hand | YES | No |
| Production workflow (multiple scenes, multiple accounts) | No | YES |
| Time pressure | No | YES |
| Need batched parallel generation | No | YES |
After a few manual runs, you'll naturally graduate to the Generation Runner for production work.
When you're ready
→ Next: Reviewing in PatchWork — deeper detail on the candidate-picking flow, especially for multi-account workflows.